
What is VLOOKUP?
VLOOKUP is an app on the HubSpot Marketplace that helps you create data-driven workflows. It does this through a workflow actions that takes a value from a HubSpot record as input and uses that values to "look up" a value from a data set that you control.

The result of this workflow action can then be used in subsequent steps.
Here's a quick video demonstrating how the Workflow Action works.
Is VLOOKUP certified by HubSpot?
![]() Yes, VLOOKUP for Workflow is certified for the HubSpot App Marketplace.
Yes, VLOOKUP for Workflow is certified for the HubSpot App Marketplace.
It has has passed an extra technical review and been recognized for quality by the HubSpot Developer team.
When visiting the VLOOKUP Marketplace Listing, you will see it labeled as a HubSpot Certified App.
Installing VLOOKUP
Start by going to the VLOOKUP Marketplace Listing and clicking Install App.
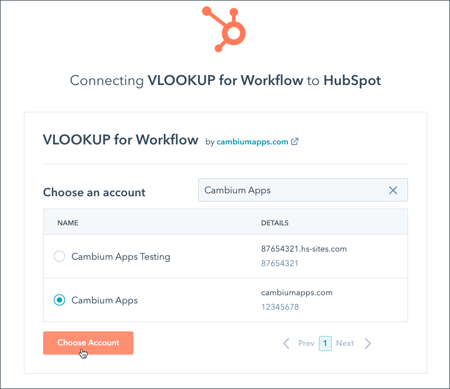
You will then be taken through a process of selecting your HubSpot portal...
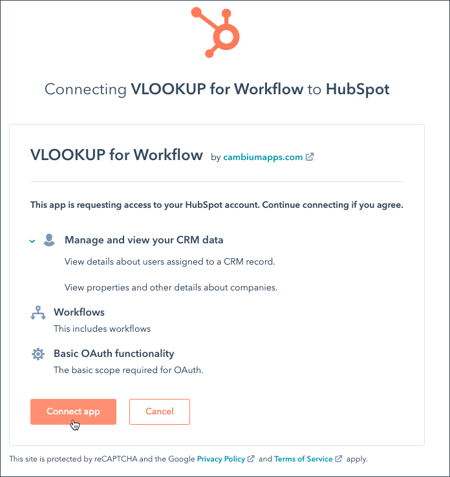
and approving the connection...
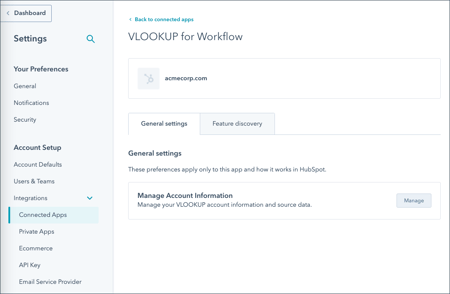
Once this is complete, you will land on the settings page for the VLOOKUP for Workflow connected app in HubSpot Setup.
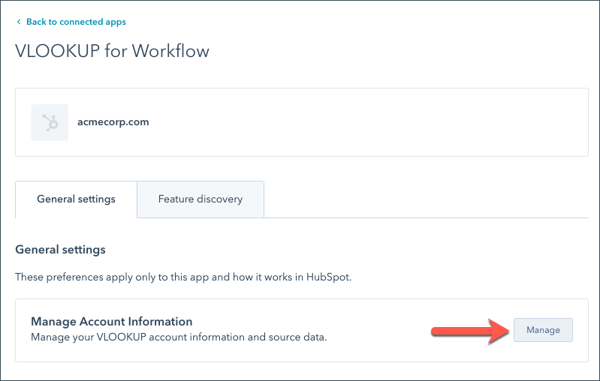
Click the Manage button in the Manage Account Information section. This will pop up the VLOOKUP Settings page and you can create your first VLOOKUP Source (CSV or Google Sheets). After that, you are ready for your first use of the workflow action.
After installation, your account will begin a 14-day free trial period. The user who installed VLOOKUP should receive an email from us with more information.
Installing VLOOKUP from the Workflow Editor
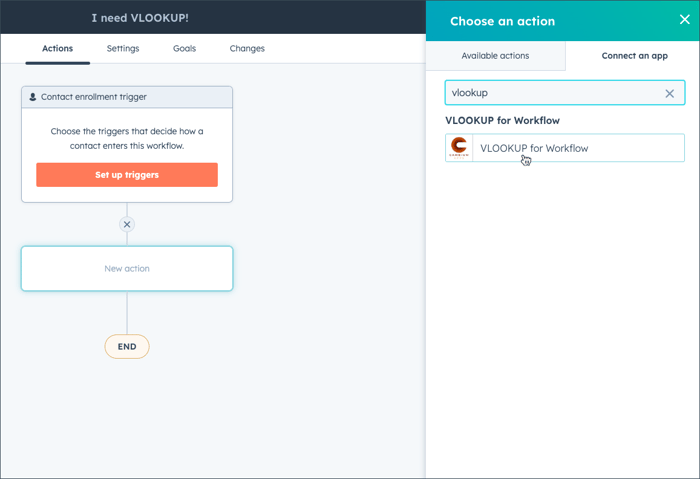
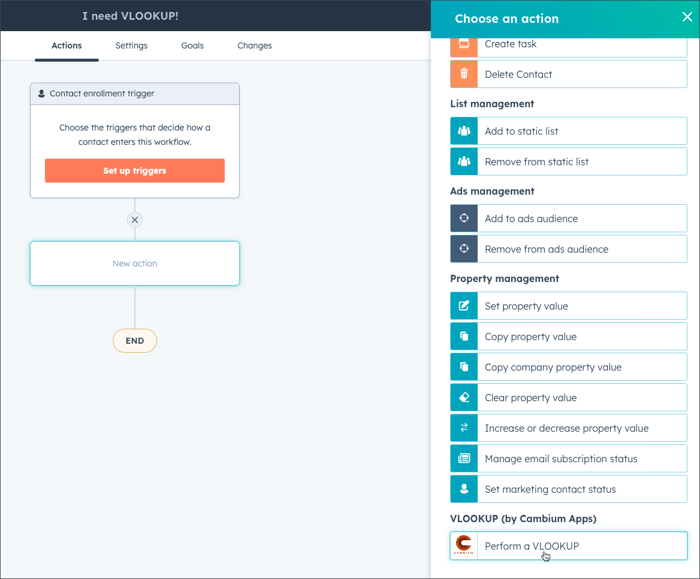
When working in the Workflow editor and adding an action to your workflow, HubSpot allows you to Connect an app. If you do not already have VLOOKUP installed, this is an easy way to get started. Find VLOOKUP for Workflow in the list and click it.
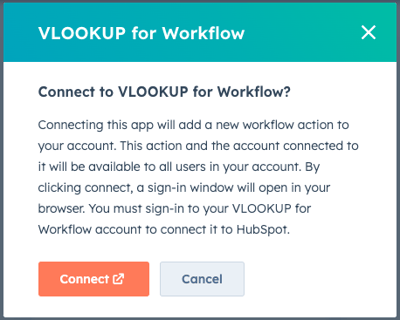
You will be prompted with information about what to expect. Click Connect.
This will bring you to the HubSpot Marketplace and you will follow the traditional install steps. Don't forget to create a VLOOKUP Source (CSV or Google Sheets).
After you complete those steps, come back to your workflow and you will see the following prompt. Click Complete.

VLOOKUP will now be a workflow action option in your system. If you do not see it listed, try refreshing your browser and it should then appear.
You are now ready for your first use of the workflow action.
Where is the VLOOKUP Settings Page?
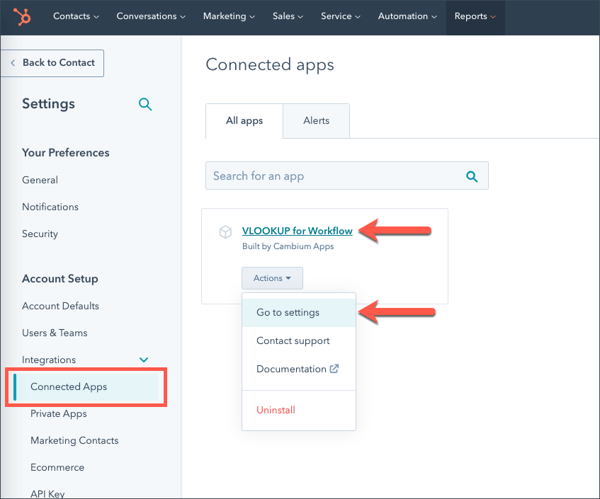
The VLOOKUP settings page is in the HubSpot setup area. Go to the Settings | Account Setup | Integrations | Connected Apps in HubSpot (as shown below). Find VLOOKUP for Workflow and either click on its name or choose Go to settings from the Actions list.
This will bring you to the settings page. Click the Manage button to open the settings page.
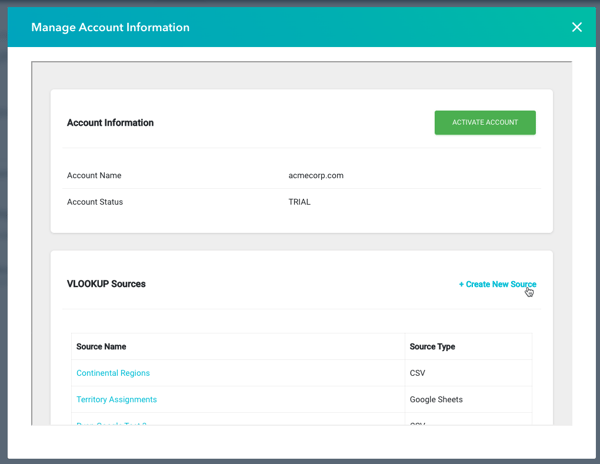
A popup window will open bringing you to the page where you can manage your account and create/edit your data sources.

Creating a CSV Source
IMPORTANT NOTE: VLOOKUP will always perform its lookups against the first column in your Source. This is the value that needs to match a value that from HubSpot's workflow. Once the matching row is found, any column within that row can be returned to the Workflow.
All administration of VLOOKUP is performed in our settings page. This can be found by going to the VLOOKUP for Workflow "Connected App" in HubSpot. Then click the Manage button in the Manage Account Information section.
This will pop up the VLOOKUP Settings page. Click Create New Source along the top of the VLOOKUP Sources list.
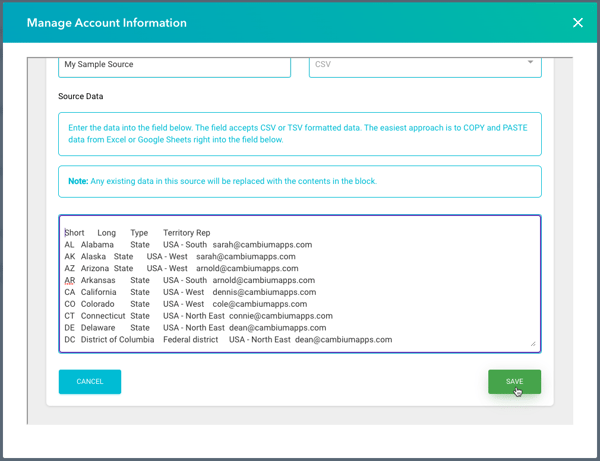
To create the source, enter a Source Name, select CSV for the Source Type and then paste in your data into the big text box. The text box will accept EITHER:
- (recommended) Data pasted in from a spreadsheet program like Excel or Sheets. This technically pastes in as tab-separated data, but it will be accepted. The screenshot below uses this approach.
- CSV formatted data. This is typically copied from an existing CSV file when looking at it as a text file
In both of the above cases, the data should have the column headers in row 1. See below for an example.

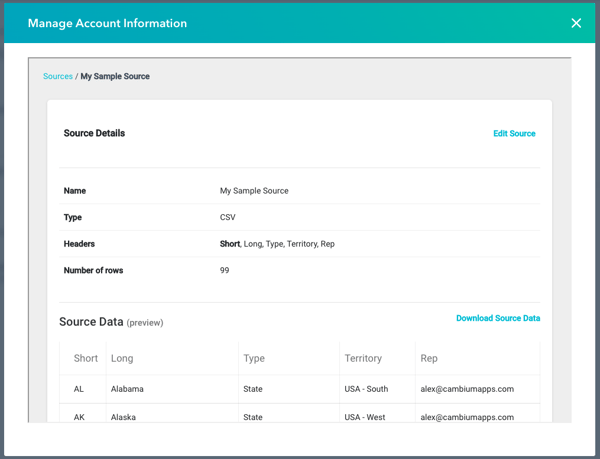
Click Save and that's it. Your Source is now ready to use in Workflow. You can get a Preview of your data by going back to the All Sources list and clicking on your new Source.
If you need to make any changes to your CSV source, follow these instructions.
Editing a CSV Source
IMPORTANT NOTE: VLOOKUP will always perform its lookups against the first column in your Source. This is the value that needs to match a value that from HubSpot's workflow. Once the matching row is found, any column within that row can be returned to the Workflow.
Perhaps you created a CSV source in the past, but now need to make some changes. To do so, open the VLOOKUP Settings and click through on the Source you wish to edit.
If you have the updated data ready to paste into VLOOKUP, then click Edit Source. If you don't have the data handy, click the Download Source Data link, which will download a CSV file to your computer, which you can open in a spreadsheet program to make your edits.

Once the data is ready for upload to VLOOKUP, click Edit Source. This will bring you to the edit page.
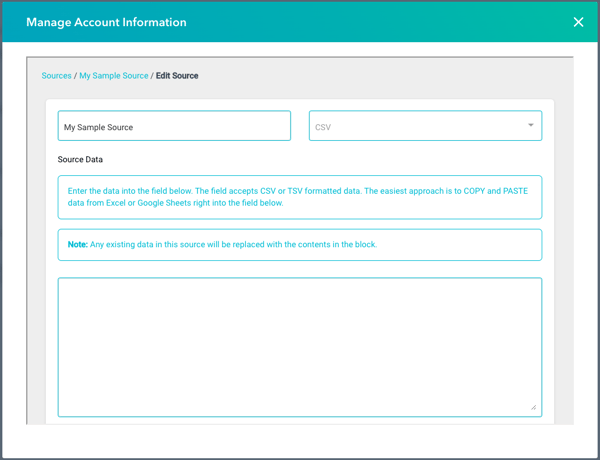
Note that your current data is not loaded into this page. The expectation is that you will paste in updated data to completely replace the data in this source.

In the example above, I changed some of the rep assignments. When I Save this source, those new assignments will be used in future workflows.
Creating a Google Sheets Source
IMPORTANT NOTE: VLOOKUP will always perform its lookups against the first column in your Source. This is the value that needs to match a value that from HubSpot's workflow. Once the matching row is found, any column within that row can be returned to the Workflow.
ANOTHER IMPORTANT NOTE: Once a Google Sheets source is created and used in Workflow, it is recommended to not change the purpose of a column or to change the order of the columns. If you do, it is recommended to revisit your Workflows using that Google Sheet and confirm the correct column is selected to be returned.
Using Google Sheets for your source data is probably the most convenient approach since VLOOKUP will read directly from the Sheet, allowing you to make changes as you see fit.
To get started, open the VLOOKUP Settings and click Create New Source.
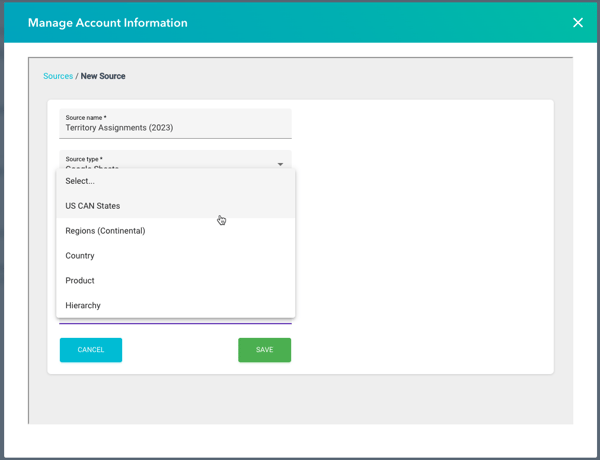
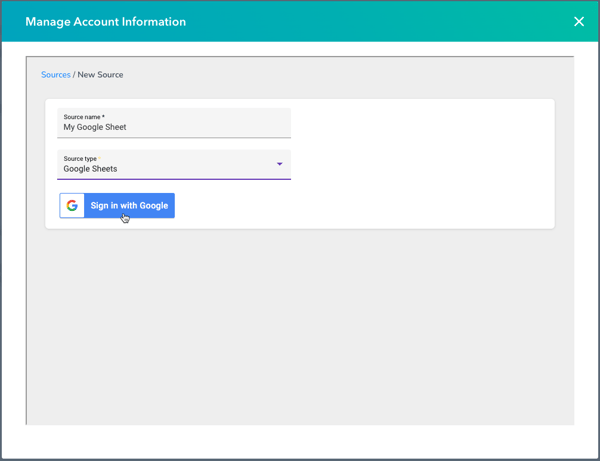
Give the Source a Name and select Google Sheets as the Source Type.
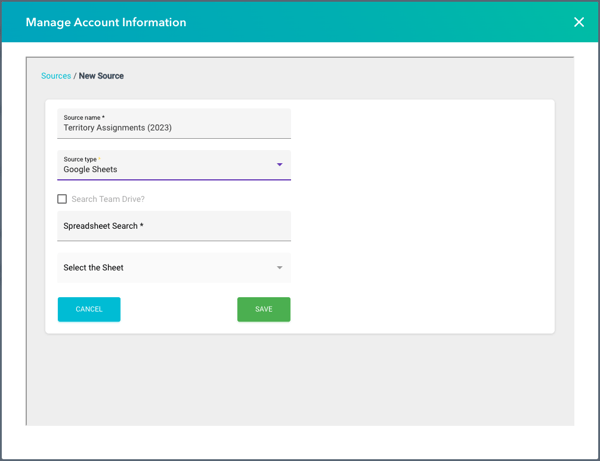
NOTE: If you have never connected VLOOKUP to Google Sheets, you will be prompted to Sign In with Google before you are able to continue.
By default, the search will be against the My Drive of the user connected to Google. To search a Shared Drive (aka Team Drive), click the Search Shared Drive box and select the Drive to search. Once you've determined the drive to search, enter a search term into the Spreadsheet Search box and hit ENTER to see search results.

Select a Google Sheet file from your search results, then select a Sheet (tab) from within that Google Sheet. As you can see, you can have multi-tab/complex Google Sheets that you reference. VLOOKUP just needs to know one Sheet to look in.
That's it. Now just Save the source.

Viewing the Google Sheets source in VLOOKUP shows general information about the source. Most important is a link to the source in Google Drive.

Making a Google Connection
The first time that you try and create a Google Sheets source, you will be asked to make a connection to Google Drive. Click the Sign In with Google button to continue.
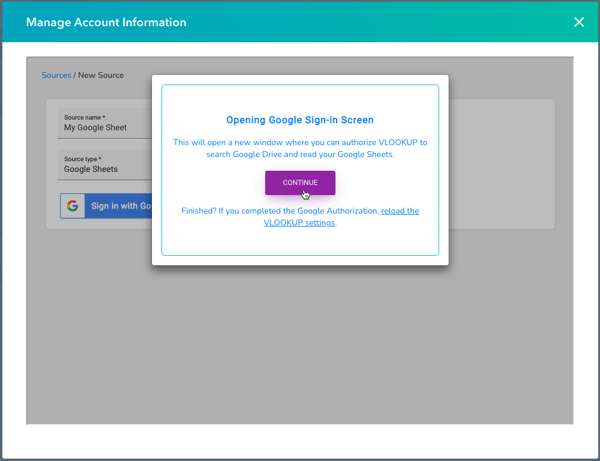
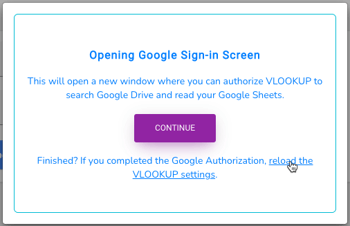
You will be prompted once more letting you know that you will be jumping to a new page to connect.
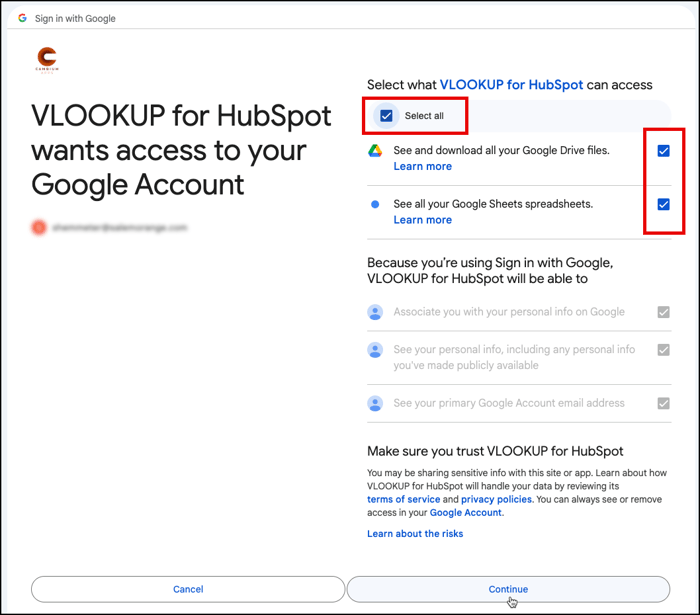
After signing into Google, you will be asked to approve a connection by VLOOKUP for HubSpot. It is very important that you Select All of the scopes available to select. If you do not, you will not be able to connect your files. See the image below for guidance.
Once approved, you will be brought back to the Settings page to create a new source. You can also close the tab you are in to return to HubSpot where you can reload the VLOOKUP settings and start the source creation process again.
Using the VLOOKUP Workflow Action
The VLOOKUP workflow action is the heart of the application. To use it, add a new action and choose the Perform a VLOOKUP action.

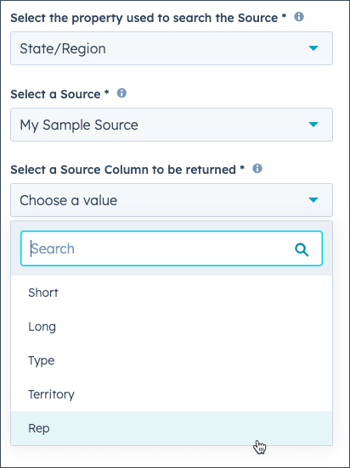
The action is asking for 3 pieces of information:
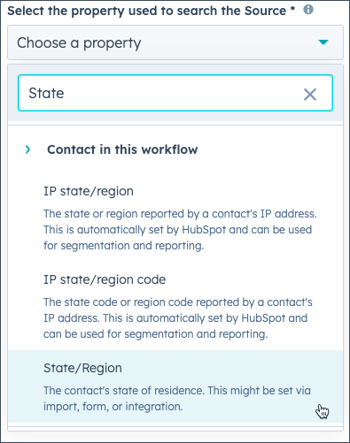
- The HubSpot property value to use in the VLOOKUP search.
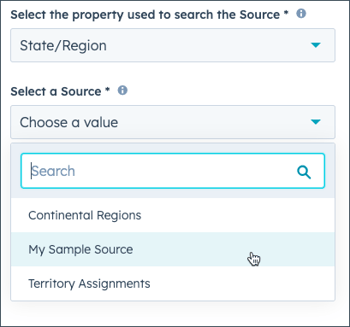
- The Source from which to perform a look up
- The Source Column to return when a matching row is found.
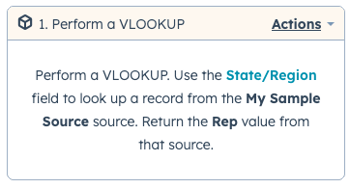
Now the Workflow Action has been configured and will look like the image below in the workflow user interface.
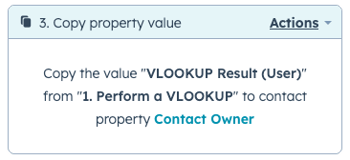
The next step is to use the outputs from this workflow action in subsequent actions, such as Value equals branch and Copy property value actions. Below is a visual example of using the output from the action to update the owner property on a contact.
Explaining the Workflow Output Values
After implementing the VLOOKUP Workflow Action, subsequent steps will be able to use its output. The options will look like the image below.

Below is an explanation of all of the output values available to you...
This action’s final success or failure state: This is a built-in HubSpot option allowing you to use success, failed, and skipped options. This is not often used.
Was a Result Found? This will return in Yes or No based on whether the VLOOKUP was able to find a corresponding row & column when performing the action. This is an important field to use in a Value equals branch step to confirm that a value is available for use.
VLOOKUP Result (datatype): There are a number of these fields available. The reason is that HubSpot only lets you write certain field types back to HubSpot properties. Having all of the options available to you allow you to be able to write values back to any HubSpot field.
VLOOKUP Result (Text): If a result was found in the VLOOKUP, this field will always be populated with the text value from your data source.
VLOOKUP Result (Number): If the VLOOKUP Result (Text) holds a value that is numeric, this field will be populated with that value as a number. This allows you to write to number and currency properties in HubSpot.
VLOOKUP Result (Boolean): If the VLOOKUP Result (Text) holds a value that is "true" or "false", this field will be populated with a real boolean true/false value. This allows you to write to checkbox properties in HubSpot.
VLOOKUP Result (Date): If the VLOOKUP Result (Text) holds a value that is in a YYYY-MM-DD date format, this field will be populated with that value as a Date. This allows you to write to Date and Datetime properties in HubSpot.
VLOOKUP Result (User): If the VLOOKUP Result (Text) holds a value that is an email address, this field will be populated with the HubSpot Owner ID corresponding to that email address. This allows you to write to HubSpot User properties.
Result Data Type: If a value is found, this field will be populated and it will be populated with the most precise data type of the value it found. This allows you to use a Value equals branch action to confirm a data type before trying to write to HubSpot. Possible values are:
- Text: This will be set if a result was found and the value is not determined to be any of the data types below.
- Number: This will be set if the result is numeric. If set, you can count on VLOOKUP Result (Number) being populated.
- Boolean: This will be set if the result is boolean. If set, you can count on VLOOKUP Result (Boolean) being populated.
- Date: This will be set if the result is a date or datetime. If set, you can count on VLOOKUP Result (Date) being populated.
- HubSpot User: This will be set if the result is a valid HubSpot user's email address. If set, you can count on VLOOKUP Result (User) being populated.
Value Being Looked Up: This returns the value from the triggered workflow record. This value is probably not used often in your workflow, but it is valuable information to see when troubleshooting a workflow action result for a specific record.
What information is sent to VLOOKUP?
When the Workflow Action runs a VLOOKUP, it sends a payload to our app with information about the Source (what source and what column in the source to return) and the value from the property specified in the workflow action. An example of the information our services received is below.
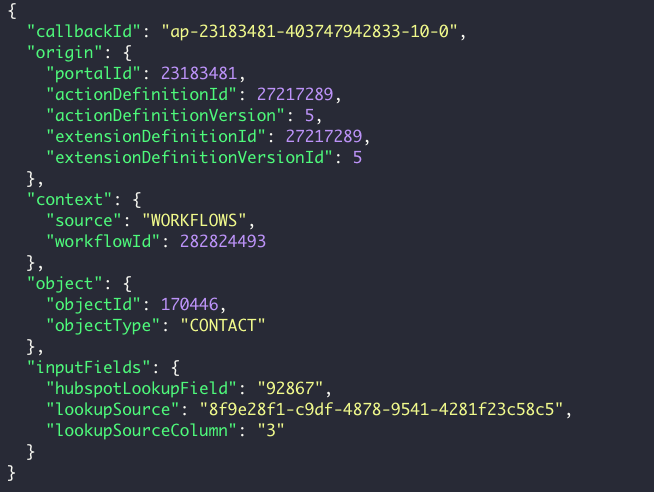
Most of the information is system level information. You can learn more about HubSpot's Custom Workflow Actions in their documentation. The information most relevant to our users is described below:
portalId: The portal ID refers to your HubSpot system. Our servers receive messages like the image above from many different HubSpot systems. The Portal ID tells us who the VLOOKUP customer is.
lookupSource: This is the ID from our database that refers to the CSV or Google Sheets source that was setup in the VLOOKUP settings page.
lookupSourceColumn: This tells us which column within the data to return.
hubspotLookupField: This is the only piece of business data that is sent to us. The value sent to us is driven by what HubSpot Property is selected in the workflow action. In the example above, it looks like the Postal Code property is being sent to us. This value is then used to look within column 1 of the lookupSource. We then return the value from the lookupSourceColumn once we find the right row in the lookupSource.
Lastly, we do not store any of the information sent to us in these messages. These messages are kept in a queue temporarily, we use them to retrieve the data from your source, and then communicate back to the workflow in your HubSpot portal. After all of that is successful, we delete the message shown in the picture above.
Writing a date to HubSpot isn't working
If you're writing a Date value to HubSpot from Google Sheets or a CSV, make sure the date is formatted correctly.
In order for HubSpot to accept the value as a date, it must be formatted as YYYY-MM-DD.

Troubleshooting the Workflow Action
Reviewing any HubSpot Workflow is best done from the Workflow's Details page. Here you can use the Enrollment history tab to view the results at the record level or the Action logs tab to see the details of any workflow step.
Using Enrollment history, you can find the record you wish to analyze and click the Enrollment details button to open the details in a sidebar. All workflow steps will be shown with the most recent steps at the top. In this example, you can see two steps that pertain to VLOOKUP.
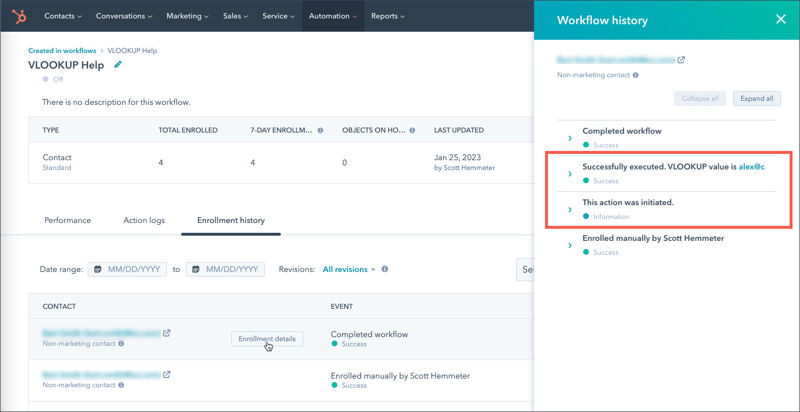
The first step executed simply says This action was initiated. Expanding that step will give you the details of what took place.
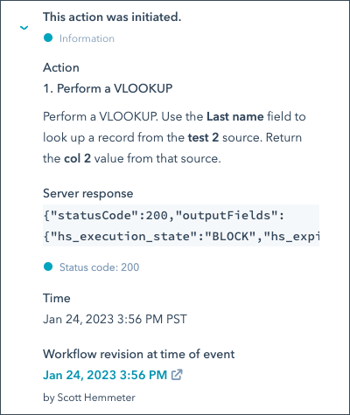
In all cases, VLOOKUP will send back a response that looks like the image above. It will tell HubSpot to BLOCK (aka "stop") execution of the workflow until VLOOKUP responds with an answer, which should come within less than 1 minute.
The next step will give you the result of the VLOOKUP. What you want to see is that it was Successfully executed. In the event the value being looked up from the HubSpot record does not have a matching row in the VLOOKUP Source, you will see a message to that effect.
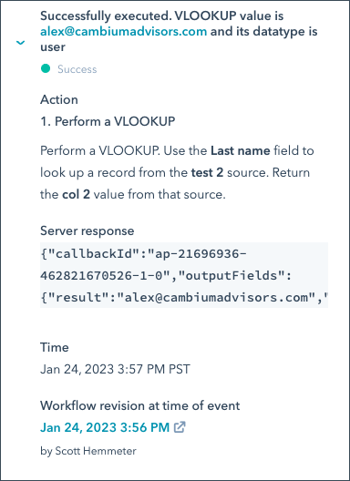
The image above contains the actual response from the VLOOKUP server and the information inside of that response corresponds to the output values documented above. An example set of values will look like below.
{
  "callbackId": "ap-12345678-362821970526-1-0",
  "outputFields": {
    "result": "alex@cambiumadvisors.com",
    "result_bm_Boolean": "",
    "result_zh_Type": "user",
    "result_am_Number": "",
    "isFound": "true",
    "hs_execution_state": "SUCCESS",
    "result_dm_User": "987654321",
    "resultCode": "success",
    "result_cm_Date": "",
    "result_zm_lookupValue": "AL"
  }
}
This information is meant for use by machine's so it looks a little cryptic, but here's some good info for troubleshooting:
- Open the VLOOKUP source (e.g. the Google Sheet or CSV). If you are using a CSV source, you can download the source data directly from the VLOOKUP admin screen.
- The
result_zm_lookupValuevalue is what HubSpot sent to VLOOKUP. This should correspond to the value on the triggered record from the property setup in the workflow. resultis the text version of the value from your Source. This should match what you see in the actual Source. If it does, then VLOOKUP is working.- Are you expecting a value in one of the datatype specific results like User? If you, you will need to determine whether VLOOKUP is putting the right value there. Use the output field reference to help you.
Still having trouble? Submit a ticket to us and we are happy to help.
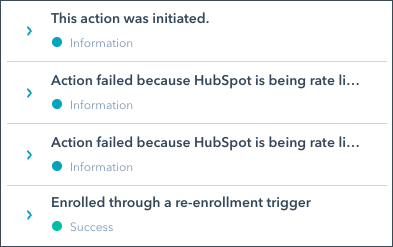
Action failed because HubSpot is being rate limited
You may come across some messages in Workflow that say the Action failed because HubSpot is being rate limited. This will only happen if you are running a very large number of VLOOKUPs all at the same time. HubSpot Workflow protects itself from doing too much at once and will add a bottleneck to processing to send all of the actions across all records more slowly. Just be patient and HubSpot will initiate the VLOOKUP properly when it has capacity.
How do I subscribe to VLOOKUP?
Subscribing to VLOOKUP is done from within the application itself. Whether your company is on a TRIAL or your trial has EXPIRED, you will see an ACTIVATE MY ACCOUNT button on the settings page.
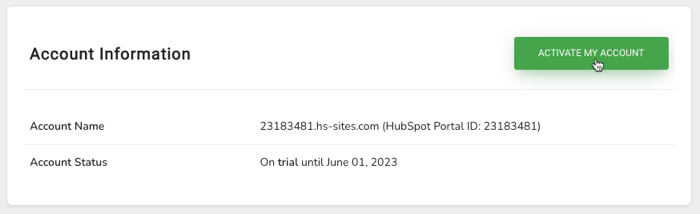
This button will take you to the Stripe website allowing you to check out and subscribe.
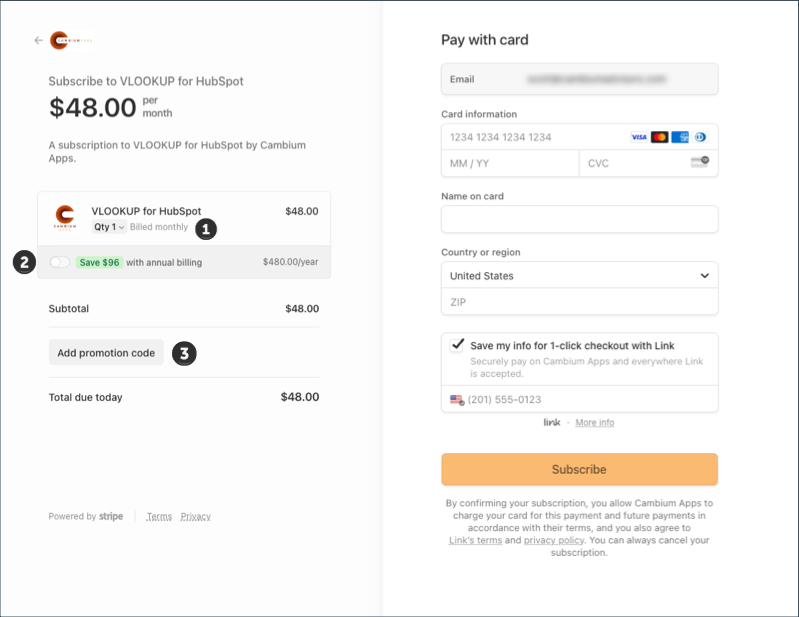
1 By default, the quantity is 1. Every VLOOKUP subscription comes with usage limits. If you would like to increase those limits, you can purchase higher quantities of VLOOKUP. For example, a quantity of 3 would triple the default daily and monthly limits.
2 You can save money by selecting Annual billing
3 If you were given a promotion code, you can apply it here.
The rest of the form is a standard eCommerce experience. Complete the credit card information and click the Subscribe button.
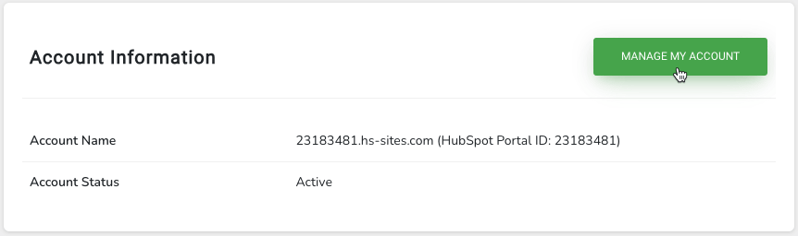
Your purchase will be applied to your account immediately. Re-open the vlookup settings page and you should see that the subscription is now ACTIVE.
How do I manage my VLOOKUP Subscription?
Managing your VLOOKUP subscription is handled from within the application itself. You will see a MANAGE MY ACCOUNT button on the settings page.
This button will take you to the Stripe website allowing you to manage your subscription:
- Click Update Plan to change from monthly to yearly billing or to change the quantity of units subscribed
- Add/Change your Payment Method
- Change your Billing Address
- Click Cancel Plan to cancel your subscription at the end of the current period
NOTE: If you have any issues with the above process, you can also visit the portal directly. This will take you to a Stripe page that asks for your email. Enter your email and you will be emailed a link to your account.
How do I uninstall VLOOKUP?
If you are an active, paying customer of VLOOKUP, it is recommended to cancel your subscription before uninstalling the application from your portal. You can do this via the Manage My Account page in the app.
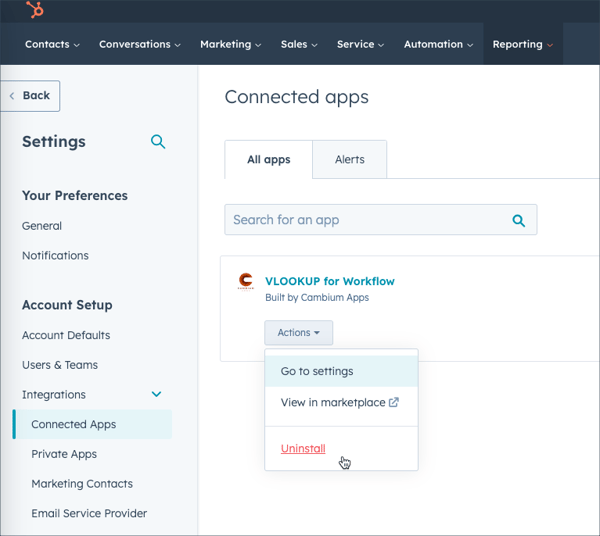
Uninstalling the app is simple. InHubSpot Setup, navigate to the Connected Apps page, find VLOOKUP, and choose the Uninstall action.
After selecting Uninstall, you will be prompted with a confirmation dialog. Complete the dialog to fully uninstall.
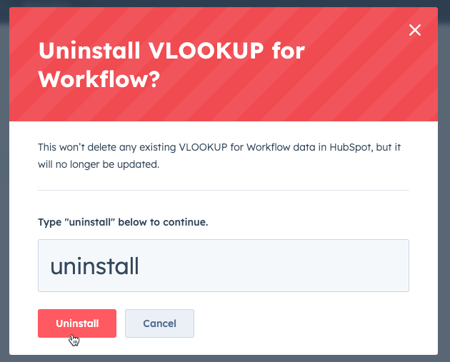
Uninstalling will remove the app completely. All Workflow Actions within existing workflows will be removed. This may cause your workflows to become invalid. It is recommended to remove all VLOOKUP workflow actions from workflows before uninstalling.